四,安装必要软件
pip3 install uwsgi
pip3 install django
yum install nginx
五,服务器获取项目源码
命令行切换到pythonproject目录:
cd /data/pythonproject
git克隆
git clone https://github.com/YXY1109/test_server.git
遇到:fatal: unable to access 'https://github.com//.git/': Empty reply from server
执行以下命令:
git remote set-url origin git@github.com:YXY1109/test_server.git
再执行clone命令,获取项目源码完成。
六,uwsgi操作
项目添加两个文件,具体代码参考git Log“服务器布部署需要的文件”
在项目根目录创建uwsgi文件夹,用来存放uwsgi相关文件
mkdir uwsgi

在uwsgi文件夹中创建uwsgi.pid和uwsgi.status文件,uwsgi.pid文件用来重启和停止uwsgi服务,uwsgi.status用来查看uwsgi的服务状态。

完成配置后,初始化uwsgi
cd ..
uwsgi --ini uwsgi.ini
cat uwsgi/uwsgi.pid

cat一下pid文件,得到一个pid号:25531
同时我们用ps命令查看一下uwsgi的进程,发现主进程的pid与我们的pid文件里存的是一样的
ps aux|grep uwsgi

最后执行nginx命令
nginx
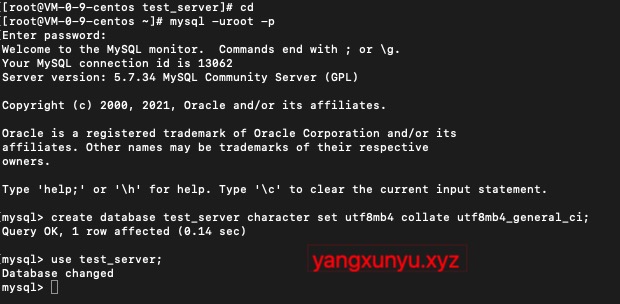
七,创建数据库
cd
mysql -uroot -p
create database test_server character set utf8mb4 collate utf8mb4_general_ci;
use test_server;

七,操作Django
提交到github的代码有点小问题,需要将/TestServer/settings.py中DEBUG=True改为False
cd
cd /data/pythonproject/test_server/
python3 manage.py makemigrations
python3 manage.py migrate
创建admin用户
python3 manage.py createsuperuser

八,修改nginx配置文件
如果对nginx配置不太清楚的,可以先看看我的这篇文章,nginx详解。
添加如下配置
#测试服务
server {
	listen       *:8085 ssl;
	include /etc/nginx/default.d/nginx_server.conf;
	location / {
		include /data/pythonproject/test_server/uwsgi_params;
		uwsgi_pass 127.0.0.1:8084;

		include /etc/nginx/default.d/nginx_location.conf;
		}
	location /static/ {
		root /data/pythonproject/test_server/;
		break;
		}
    	}
九,启动服务
cd /data/pythonproject/test_server
python3 manage.py runserver 0.0.0.0:8084
浏览器访问:http://yangxunyu.xyz:8084/admin

样式失效,执行命令:
python3 manage.py collectstatic --noinput
uwsgi --ini uwsgi.ini
ngxin -s reload
提示端口已存在的解决方案:
lsof -i:8084
kill -9 xxx
启动服务:
head -1 uwsgi/uwsgi.pid
kill -9 xxx
uwsgi --ini uwsgi.ini
nginx -s reload
十,总结
至此部署服务器都完成了。
后台管理地址
